main sources:
 |
| the completed drum |
 |
| the completed drum bottom bottom view |
 |
| the completed drum top view |
expendable materials:
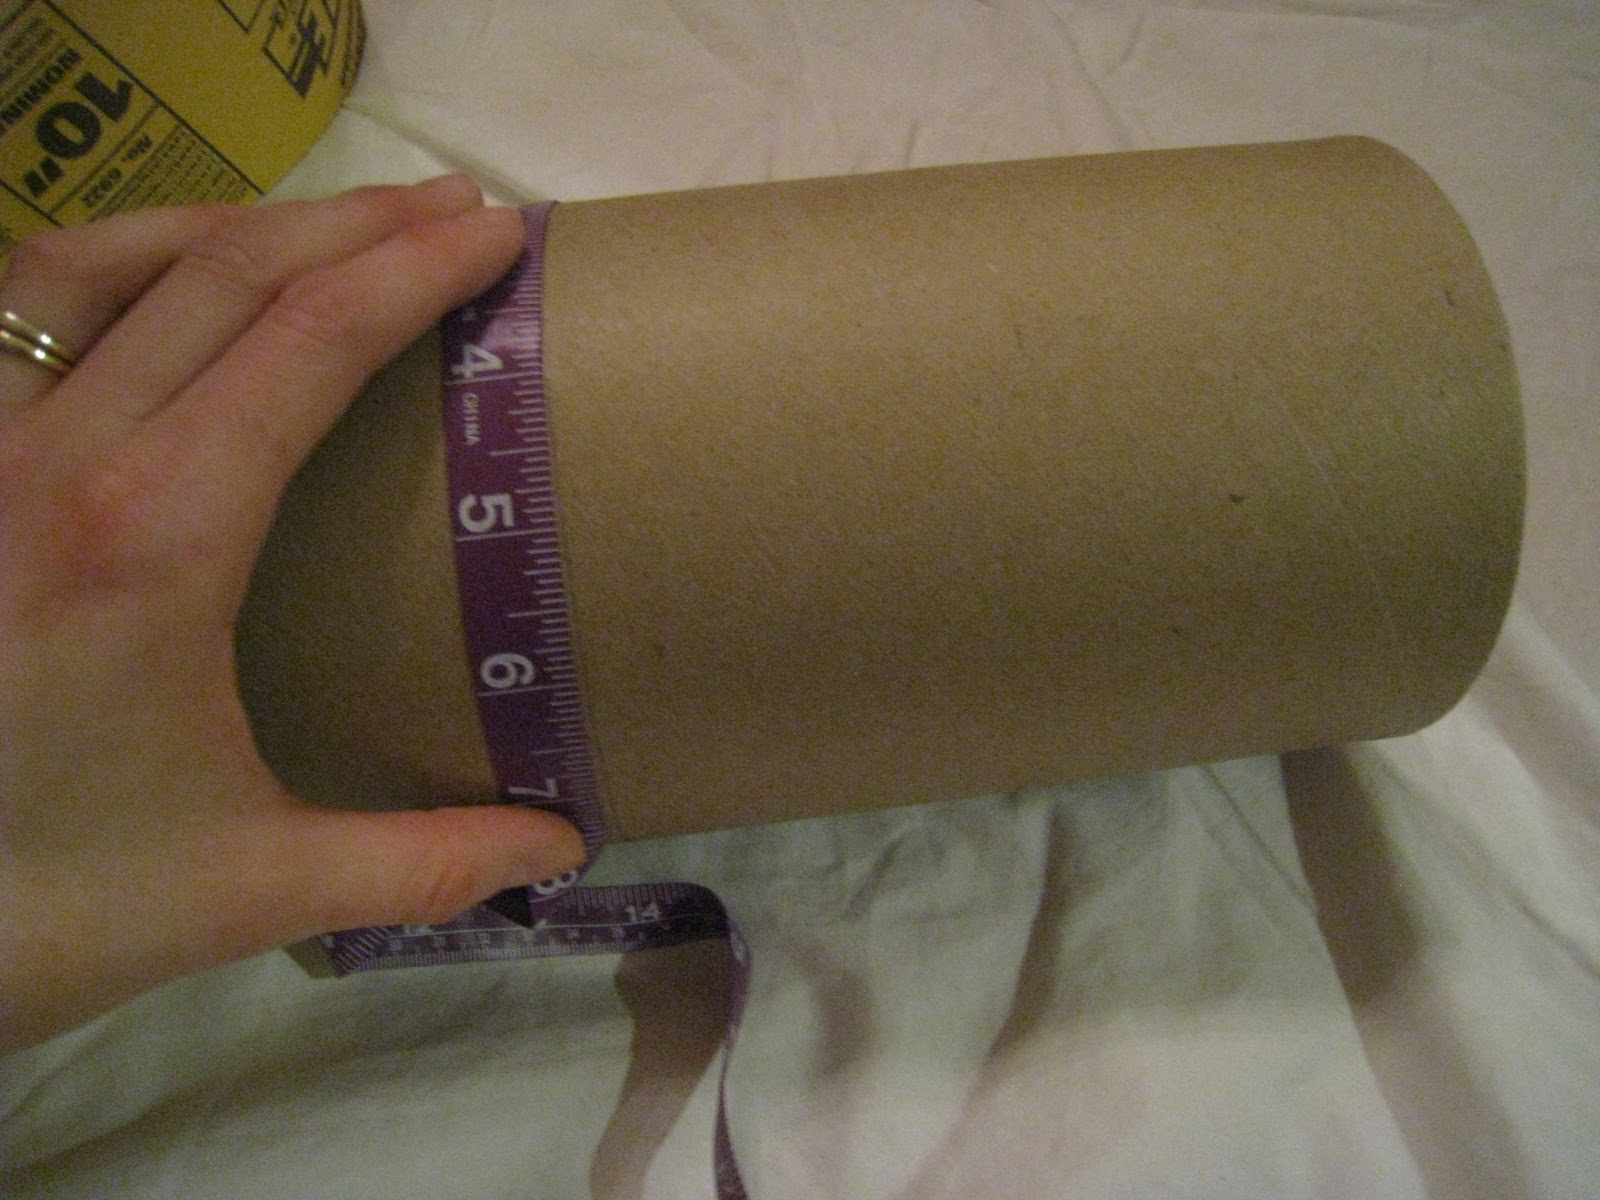
10" diameter cardboard tube (I used a Quick-Tube brand concrete form tube, which I measured in the store to find one closest to 10" because there seems to be a big margin of error on these)
12in/30.5cm embroidery hoop
piece of luan (very thin type of plywood. you'll need a piece big enough to cut a 10" diameter circle)
decorative fabric to cover outside of drum (1 yard is plenty for one drum)
nylon fabric for drum head (sometimes called "pack cloth", i used a 16"x16" piece)
5" diameter cardboard tube (I used a Hannaford brand oatmeal container)
electrical tape (i chose black)
3/8"/10mm staples for staple gun
glue (I used Elmer's, Gorilla Glue, and waterproof silicone for various steps, but you can read and decide...)
tools:
mini hacksaw
sponge brushes
little bowl to put craft glue in
spring clamps
hose clamps
tape measure
pencil
cloth rag
work shears
staple gun
basin of water
hammer
chalk
iron and ironing board
waterproof sealant for outside of drum body
rubberizer for drum feet
INSTRUCTIONS
Step 1: Cutting The Drum Body
Step 2: Cutting Out the Feet
Step 3: Reinforcing the Rim
Step 4: Building The Internal Apparatus
Step 5: Installing the Internal Apparatus
Step 6: Putting on the Drum Head
Step 7: Decorating the Outside
Step 1: Cutting The Drum Body
 |
| 10" cardboard concrete form tube, cut in half. |
Step 2: Cutting Out the Feet
 |
| with a pencil, mark three arcs on the bottom end of the drum. mine were 1.75" tall, 5.25" wide, and 5.5" apart. with the mini hacksaw, cut out the arcs to form the drum's "feet." |
 |
| feet complete |
note: i found the mini hacksaw blade to be a little flimsy for this job, and it took a lot of work to cut through the cardboard. the blade also chewed up the edge of the cardboard a bit. i might consider buying a more sturdy replacement blade.
Step 3: Reinforcing the Rim
 |
| 12" embroidery hoop (diameter of this needs to be bigger than the drum's because you'll be clipping off the fastener, thus losing an inch or more. |
 |
| using work shears, clip off the fastener on the outer hoop. |
 |
| clip the inner hoop at the already-existing indentation |
 |
| fit the first hoop into the top of the drum and clip it with the scissors so that it will be a tight fit. then remove it and use Gorilla Glue to glue it in place (follow directions on the bottle). |
 |
| after repeating the fitting process with the inner hoop, apply glue around the inside of the first hoop and set the second inside of it. |
 |
| clamp and allow to dry for recommended time on glue bottle. |
Step 4: Building The Internal Apparatus
 |
| cut a "donut" shape out of the sheet of luan.it should be 10" diameter with a 5" diameter hole in the middle. |
okay, so I cheated on this step too. again, my grandfather cut this out for me.
 |
| peel the label off the oatmeal container. use the tape measure and pencil to measure and mark a 3" tall section on the container. |
 |
| remove the plastic ring from the top of the oatmeal container. |
 |
| cut off the bottom of the container, then cut along your line. |
 |
| you'll end up with a 3" tall section that looks like this. my Hannaford brand oatmeal container yielded exactly 3 of these, in case you're making multiple drums at once... |
 |
| insert one section of the oatmeal container into the wooden ring and glue. i used wood glue for this step, but i debated the type of glue for a while...i propped it up on my foam brushes so that about an inch of the cardboard was hanging out on the other side. let it dry overnight. the next day I flipped the whole thing over and glued the other side just to be safe. |
 |
| for my second drum i used waterproof silicone (we had it around the house from fixing the bathtub) instead of wood glue for this step. they both seemed to work. time will tell if one method has more longevity. |
 |
| set the drum down feet up, and insert the apparatus. wearing gloves, squeeze the silicone around the place where the drum wall and apparatus meet. |
 |
| use your finger to gently press the caulk into place, then allow it to dry for a few hours. |
 |
| flip the drum upside down and repeat the caulking process on the inside |
 |
| soak the nylon material in water. soaking the fabric should help it to stretch as much as possible when you put it on the drum so that it will stay tighter longer. |
 |
| hose clamps |

 |
| connect the hose clamps together to create one big clamp |
 |
| clamp the fabric onto the top of the drum. pull the fabric as tight as possible all the way around, and tighten the clamps. leave room above the clamp to do your stapling. |
 |
| use the staple gun around the top edge of the drum. make sure the staples go into your reinforced rim. i worked my way around by putting each staple opposite the one before it until they were all the way around. |
 |
| trim the fabric. |
 |
| wrap electrical tape around the bottom of the fabric to secure it to the drum, and around the rim covering the staples. |
Note: Some websites recommended painting the outside of the concrete form tube with white paint before wrapping it in fabric so that whatever is printed on the outside of the tube by the manufacturer doesn't show through. I eliminated this step by choosing fabric that was dark enough that you couldn't see through it.
 |
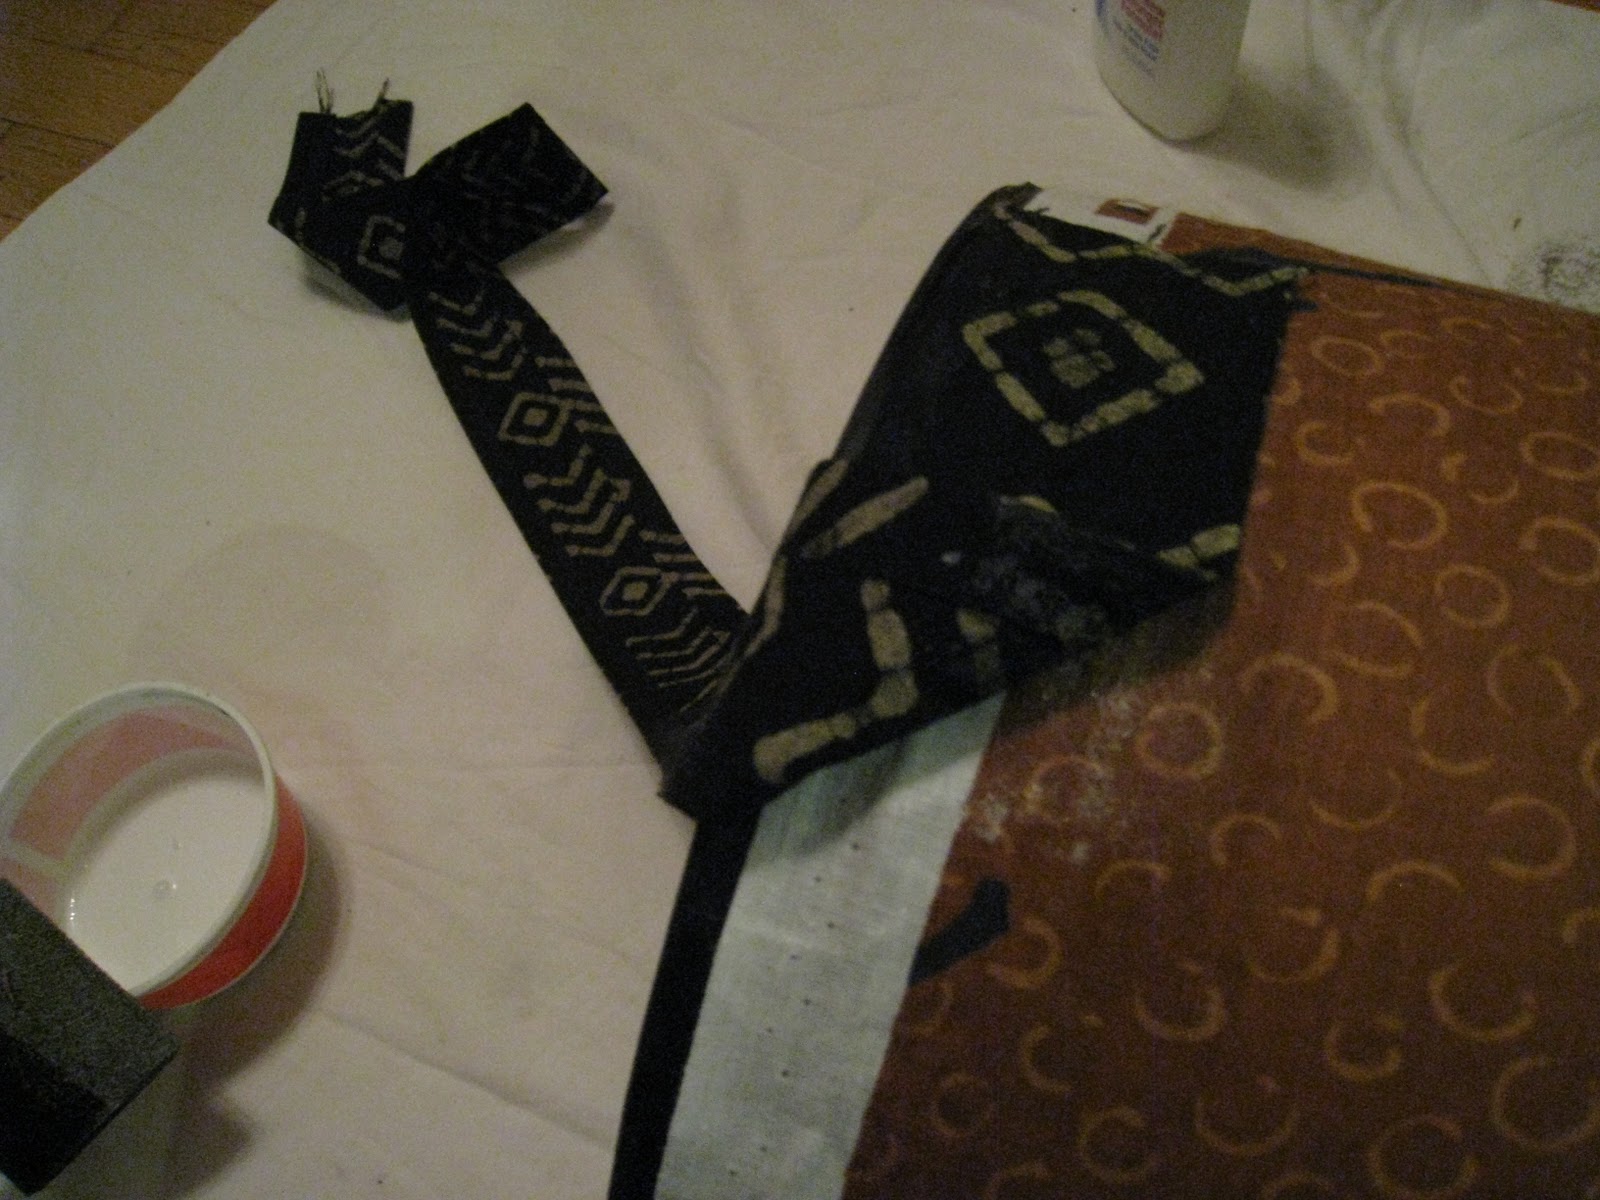
| measure and cut a piece of your decorative fabric to fit around the outside of the drum. i used chalk and a tape measure. |
 |
| iron your decorative fabric and iron down a hem on the edge. |
 |
| using a sponge brush and craft glue, apply the first strip of glue down the length of the outside of the drum. |
 |
| attach the fabric to the initial glue spot |
 |
| continue flipping back the fabric and adding strip of glue. i prefer this over gluing the whole thing at once, because you can smooth out wrinkles as you go this way. |
 |
| fold the fabric inside the drum, clip it and such to get it to fit flat against the inside wall of the drum and glue it down. |
 |
| clamp to dry. |
 |
| fabric wrap complete |
 |
| iron a strip of the trim fabric, and iron down a hem on either side. |
 |
| glue the strip of decorative fabric #2 around the top of the drum |
 |
| clamp it down for good measure while it dries, and voila! |
how have they held up? Just wondering how much use they get and if you've had any breakdown?
ReplyDeleteso far so good, they're still in great shape. this past school year they were used almost exclusively by my fourth graders, and only under my supervision. but they got a good amount of use (we used them in concert too) and seem to be holding up well. the drum head fabric is perhaps not as taut as it was initially. i'm sure i will need to replace that in time, as i didn't make an easy way to tighten the fabric. i'm hoping it will be easy enough to remove the staples and replace the fabric when the time comes without having to replace any of the other parts. i'd be interested to hear if you make any of your own and if you have any suggestions/improvements to offer!
DeleteWhat was your total cost for one drum? Thanks for the tutorial!
ReplyDeleteassuming you have all the tools but none of the expendables (including the different glues, staples, etc.), you would spend about $45 getting all the materials for one drum. i bought everything at hope depot, joann fabrics, and the $1.99 fabric store near me. since many of the materials are bought in amounts enough for multiple drums (glues, staples, etc.), you would spend a good amount less on each subsequent drum because you wouldn't have to buy them again. here's the breakdown:
Delete-10" concrete form tube: $6.23*
-1/2 yard ripstop nylon ("pack cloth"): $3*
-2'x4' sheet of hardboard/luan: $6*
-1yd decorative fabric for exterior of drum: $1.99
-1/2yd decorative fabric for rim of drum: *$1
-12" wooden embroidery hoop: $4
-3/8" (10mm) staples: $3.22*
-electrical tape: $1.97*
-gorilla glue: $6.47*
-craft glue: $1.49*
-cardboard rolled oats container: (i just had this around)*
-construction adhesive/caulk: $6.24*
*these materials would be bought in amounts enough for multiple drums
Thanks so much for the detailed tutorial! I've been working on making 6 of these drums for the children's drum group I work with!
ReplyDeleteI decided to use 12" diameter sonotubes, and ran into some interesting issues, which i thoguht I'd mention for anyone else making these drums.
Issues with using 12" sonotubes:
1. Embroidery/quilting hoops! I thought 14" ones would be the same basic structure as 12" ones, but they are not! When you get to 14" sizes hoops, they use a different clasp- it's really a clamp, made from two bocks of wood, a screw and a wingnut. So, you have to cut beyond that to use your hoop as a drum rim, but since the clamp is so big, you lose a good bit of hoop - thus, you actually need 16" hoops for your 12" drum rims! The larger diameter hoops are also wider, and harder to cut through. And, they cost a good bit more (I found some on sale for $5, but they can run as high as $7 each). You might also not find as many of them in stock - I had to go to three stores just to get six hoops. At that size, they are often called "quilting hoops" not embroidery hoops.
2. drum head fabric - you need more! I was trying to conserve fabric, so I tried to cut 15" squares from the ripstop nylon (it's usually 30" wide, so two squares per width of fabric). Unofrtunately, 15" of fabric on a 12" inch drum didn't leave me enough room to really grab a handful of fabric, and I had trouble getting it stretched enough. They aren't bad after drying, but they are very "soft" drum heads. When I cut the next ones, I went up to 20" squares, and that worked much, much better - but, it's not as good on conserving the fabric, and so you'll need more of it and have odd sized pieces left over.
3. Lastly, the bottom insert - of course, you need a larger sheet of luan for 12" diameter donuts pieces. And, I accidentally mismeasured the central holes and cut htem too large for my oatmeal canister. But, I found a neat solution
that might work well for others, too - plastic cool whip containers. They are angled slightly, so they were able to adjust easily to my imperfectly cut holes! I just trimmed the bottom of the container off with a utility knife!
Thank you again for your detailed instructions! Great drums!
Glad to be of help, thanks for your input :)
DeleteWill you please explain the purpose of the insert? How does it change the sound? Also, does the nylon fabric make a good sounding head? Cheers!
DeleteIt is my understanding that the insert creates a lower tone in the center of the drum head and a higher tone on the edge. It gives the effect of a djembe drum but is easier for students to use because it stands up on the floor without having to hold it between your legs.
DeleteThe ripstop nylon is a decent sound, and I am happy enough with it for classroom purposes.
Aha! Thank you so kindly for answering that - sorry to reply months later...
ReplyDeleteI am in the process of making these for a pilot project workshop. Your explanations help build my confidence that it will be successful!
How tight are you able to get the fabric by hand? Does it feel firm like a real djembe head or is it floppy
ReplyDeletethey're certainly not as firm as "real" drum heads, and they had some give even at first. they have loosened substantially with use, and i'll need to redo the heads soon.
Delete